This post is a follow-up to Why Do You Need to Reconcile Your Books? Check that out if you want to know the Why AND the How. 🙂
Quickbooks Online has an awesome Reconciliation feature that’s incredibly easy to use. I’m going to walk you through it step-by-step with screenshots.
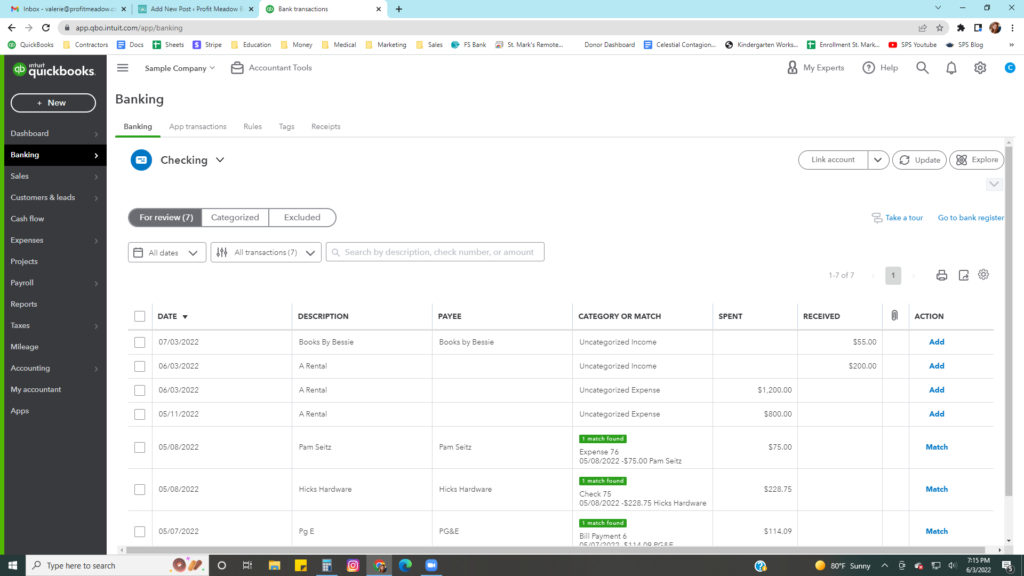
Step 1: Make sure everything in the banking tab is classified for the period you are reconciling. For this example, we are reconciling the Checking account as of 5/31/22. There are four transactions that need to be classified before we can continue because they are in the month of May.

Step 2: Get your bank statement for the period you are reconciling.
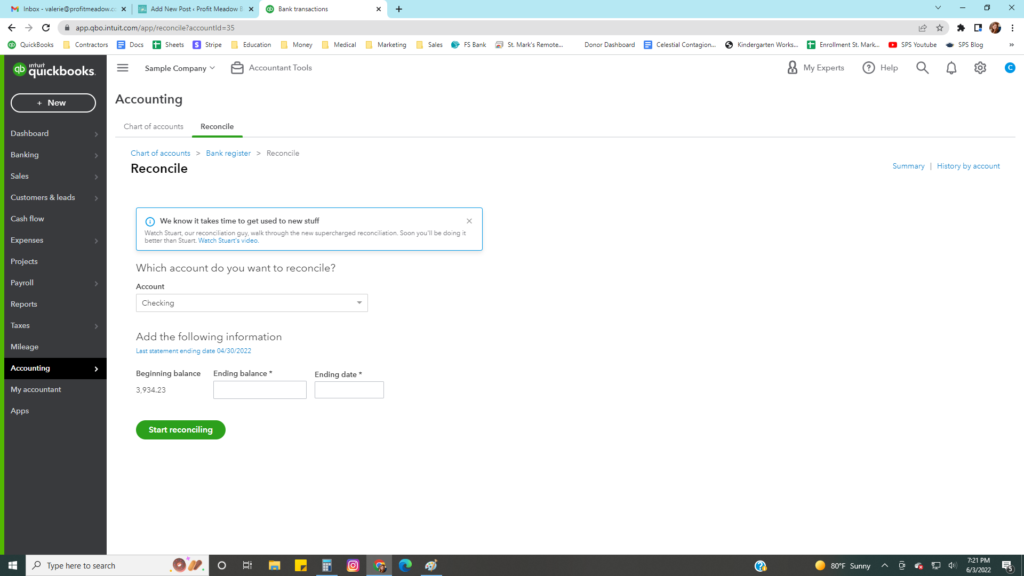
Step 3: Go to Accounting, then Reconcile. You will be prompted to put in the Ending balance from your bank statement and the statement ending date. For this example, we are using 5/31/22., and you can see that the last time it was reconciled was on 4/30/22 (in blue). It also has the beginning balance for the month, which was the ending balance from last month’s statement.

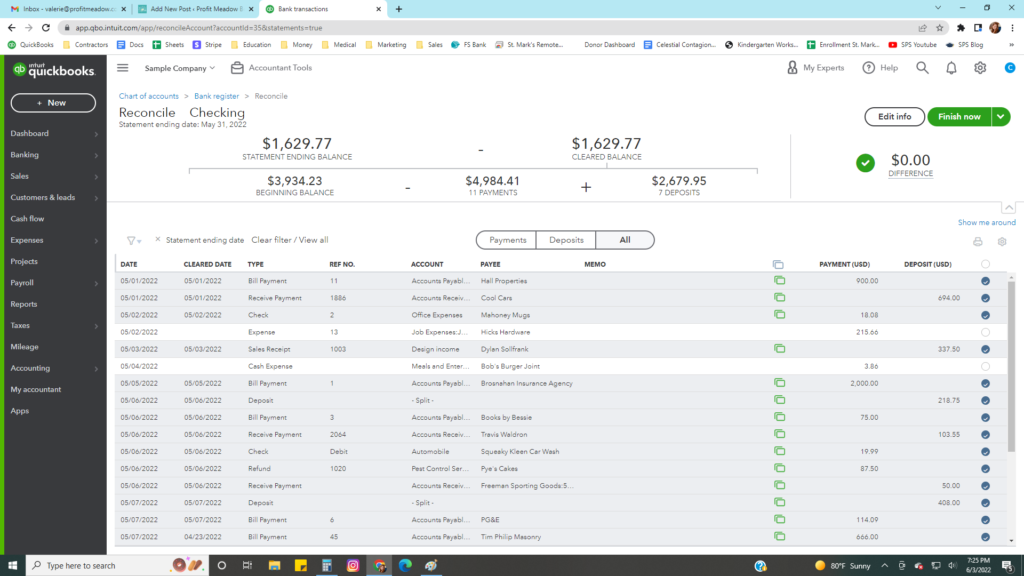
Step 4: Compare your bank statement to what is shown in Quickbooks, line by line. You can see in the second column that there is a “Cleared” date. This means it’s the date that it came through the banking feed. Items without a cleared date have been entered into Quickbooks, but the transaction hasn’t actually taken place yet. This could be because a check is in transit and hasn’t been deposited yet. Leave everything isn’t on your bank statement “unchecked” in the far right column.

If the checked items and the bank statement are identical, there will be a green 0.00 discrepancy in the top right corner. You can click “Finish Now” and the reconciliation is ready for next month!
Want to have a bookkeeper take care of this for you?
